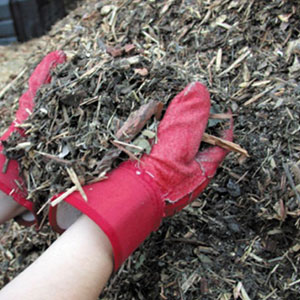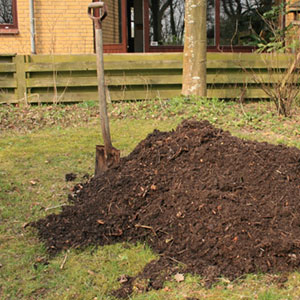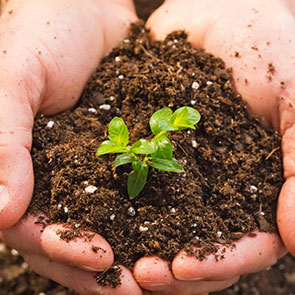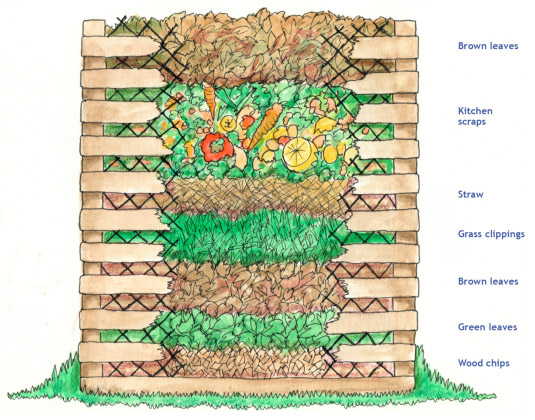
Layers of green and brown matter make for the best compost. Image credit: Landscape For Life
Use Compost
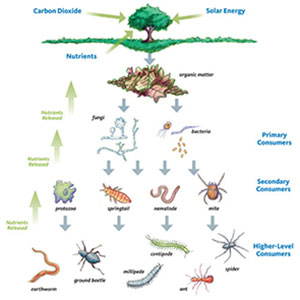
The same natural recycling that happens every day in nature is at work in a compost pile. Decomposition can take years in nature, but when you compost, you give fungi, bacteria and nature’s other decomposers everything they need to recycle much faster. A 1-inch thick top-dressing of compost on planting beds is generally all that is needed to keep soils healthy and provide plants with a balanced source of nutrients. Composting also keeps valuable organic materials out of landfills.
How to build a compost pile:
- Locate compost piles in a well-drained spot shaded from hot afternoon sun.
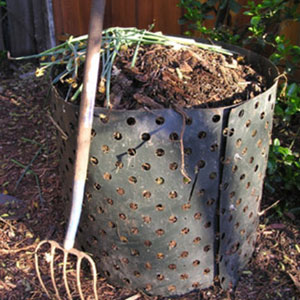
- Purchase or build a compost bin to keep organic material in and wildlife out. The bin should be about 4 feet in diameter and 3 feet tall.
- Nature’s recyclers need a balanced diet of carbon (C) and nitrogen (N). Fill the bin with alternating layers of high-carbon “brown” materials, such as leaves, newspaper and chipped woody trimmings, and nitrogen-rich “green” materials, such as grass clippings and other green garden trimmings and kitchen scraps. This will provide the C:N ration of 30:1 that will conserve the most nitrogen and carbon in the finished compost.
- Nature’s recyclers also need air and moisture. Turn the pile with a garden fork as often as necessary to keep the materials damp to the touch, like a wrung-out sponge. If they’re wet, turn the pile to increase aeration. However, too much air will dry out the pile and slow decomposition. If it feels dry, add water as you turn over the pile.
- Maximize airflow by shredding materials before adding them to the bin and by building the compost pile on a foundation of wood chips or other coarse organic material.
- Consider two compost piles, a full pile that is “finishing” and another for adding new material.
- Finished compost is dark in color and smells earthy, like soil. Usually, it’s difficult to recognize any of the original ingredients. But there’s no single point at which compost is finished — it depends on how you want to use it. For most garden applications, it’s fine to use compost that still has a few recognizable bits of leaves or twigs, which will finish rotting in the soil. If gardeners plan to use compost in seed-starting mixes, it is better to use highly finished compost.
Vermicomposting – Composting With Worms
Vermicomposting, or composting with earthworms, is an excellent way to turn food scraps into a garden resource in an apartment or wherever space is limited. The most common types of earthworms used for vermicomposting are red worms or “red wigglers” — not to be confused with the common earthworm (Allolobophora caliginosa and other species) found in garden soil. Worms for vermicomposting can be purchased from online vendors or garden stores.
Red worms break down food waste and other organic residues into compost with higher nutrient levels than traditional garden compost. It is estimated that two pounds of earthworms can recycle one pound of food waste in a 24-hour period. When finished, vermicompost has a rich, earthy smell and can be mixed with potting soils or directly used in the landscape to benefit the lawn or garden.
Caution! Be sure to contain worms that are not native to the area. Like other non-native species, worms can cause damage when introduced to new environments.
How to make vermicompost:
- Make a worm bin – A variety of untreated wood or plastic containers can be used to make a worm bin. If you use a recycled container, it should be clean and never used to store toxic materials. Bins should be opaque and no more than 8 to 12 inches deep. On average, two people produce approximately 4 lbs of food waste each week, and approximately one square foot of surface area is required per pound of waste.
- Drill holes – Drill air and drainage holes approximately ¼ to ½ inch in diameter in the sides and bottom of the bin. Slightly raise the bin with bricks or blocks and provide a tray to catch excess water, which can be used as a liquid fertilizer.
- Add bedding material – Bedding serves as habitat and food for the worms and can be shredded non-glossy newspapers,cardboard, leaves, aged straw or hay. Approximately two pounds of bedding material is needed for each square foot of bin. Two handfuls of soil or sand will supply the worms with roughage. Moisten bedding materials until wet but not dripping and spread evenly across the bin. Because the worms eat the bedding, additional materials should be added periodically with food waste.
- Add worms on top of the bedding. Exposure to light will encourage them to bury themselves in the bedding.
- Add food waste – Earthworms eat all kinds of food and yard waste including coffee grounds, tea bags, vegetables, fruit scraps and pulverized egg shells. Citrus should be added sparingly and bones, dairy products and meats should be avoided. Bury food scraps every couple days in different areas of the bin. Worms can be fed as seldom as once a week.
- Cover bin – Cover the bin to conserve moisture and exclude sunlight. Outdoor bins should be protected from freezing weather, extreme heat and rain.
- Harvest – After about six weeks you will begin to see worm castings. The average bin will need emptying every 3 to 4 months. You can gather castings by placing small piles of the compost in the sun, allowing worms to wiggle to the bottom and harvesting from the top of the pile. Sift out large particles. Other options including sifting the materials through a small screen to separate the compost and worms.
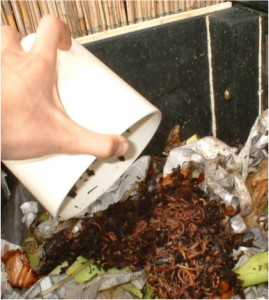
Worms being placed in vermicomposting bin. Image credit: Wikimedia Commons

